Sitemap of Diagrams
Diagrams of Electrical System
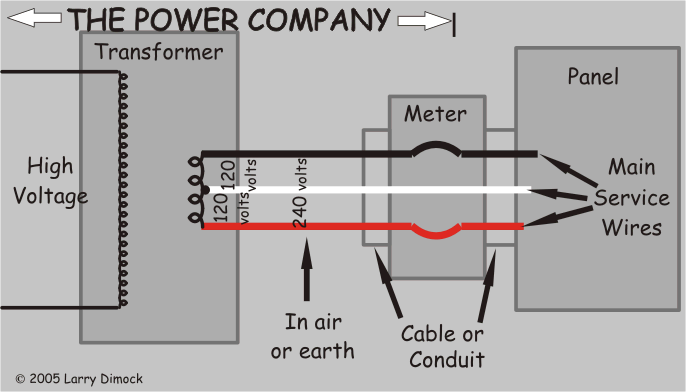
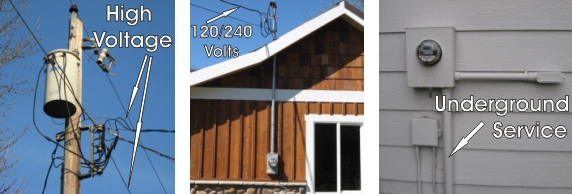
Power company & Photo
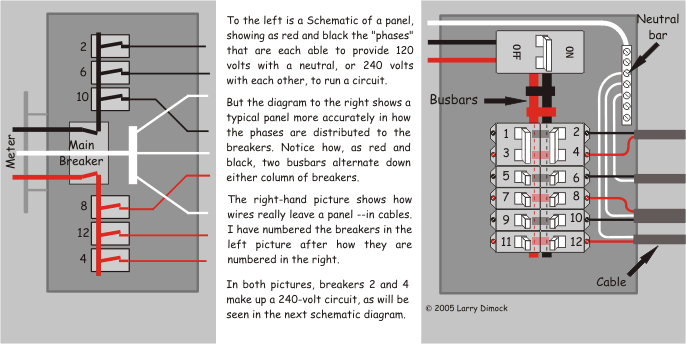
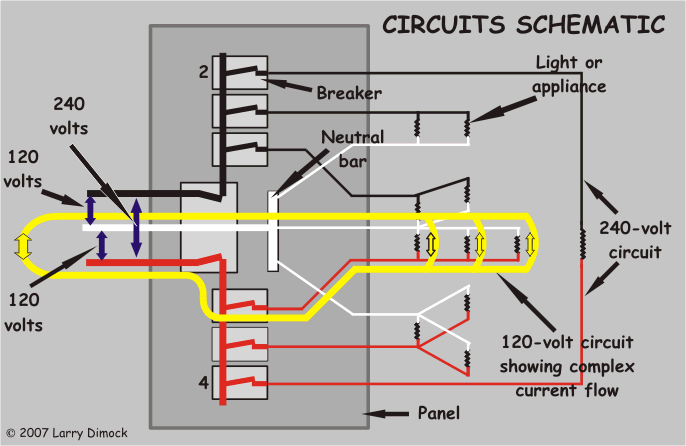
Circuit Breaker Panel
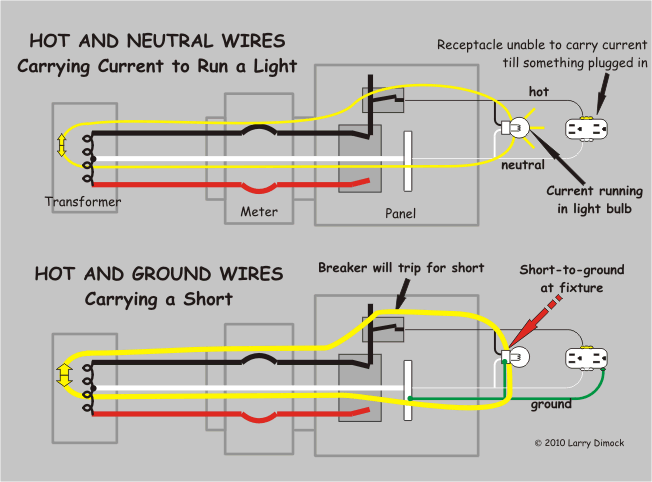
Basic circuit
Wire functions
Showing cables
From Background page:
Overall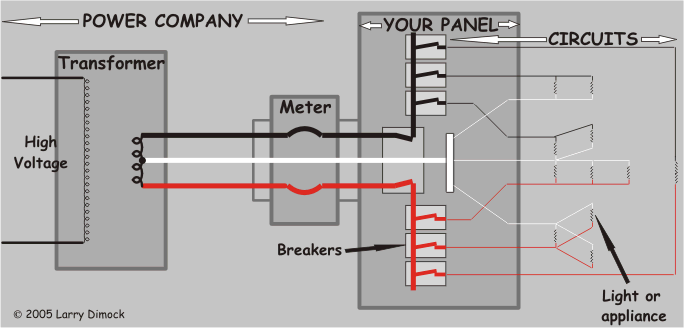
Power company & Photo
Circuit Breaker Panel
Basic circuit
Wire functions
From Tour of a Circuit page:
Typical circuit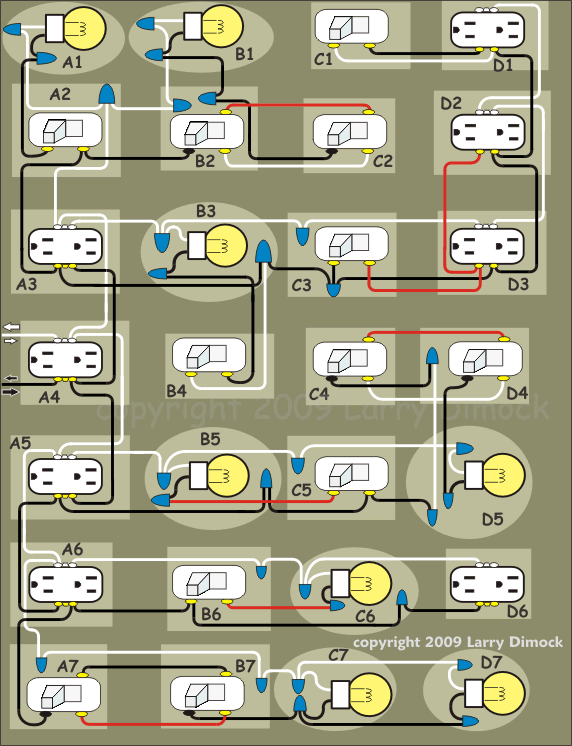
Showing cables
From Two Circuit page:
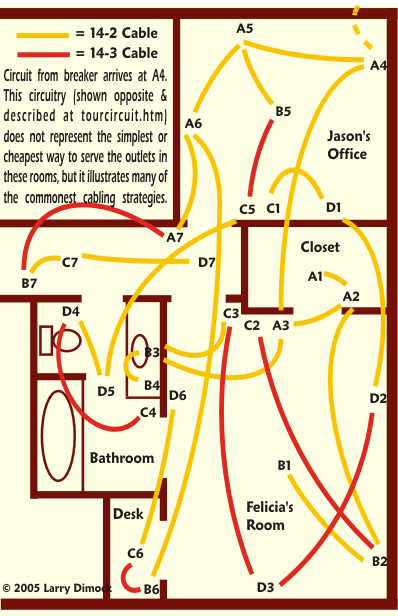
Double circuit (shared neutral)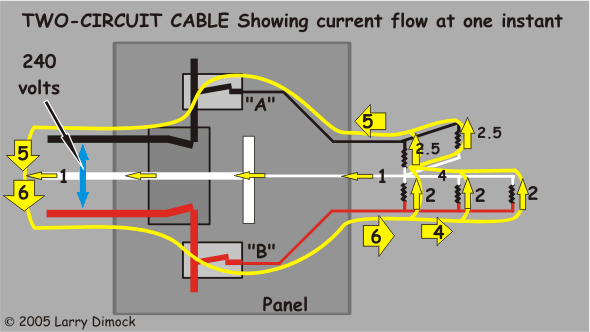
Diagrams of Opens and Miswirings
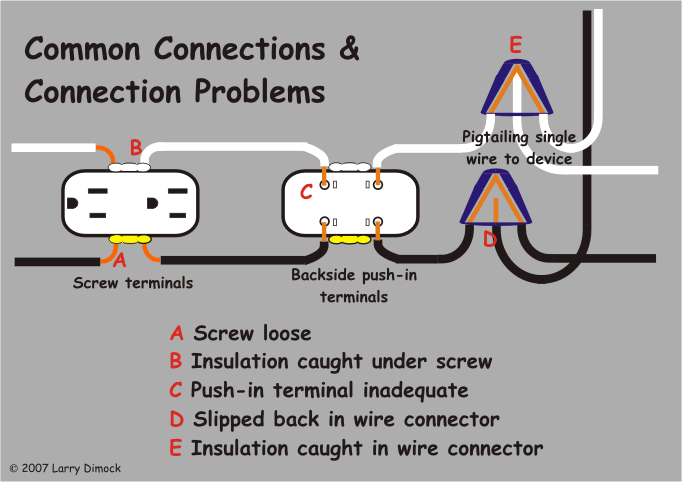
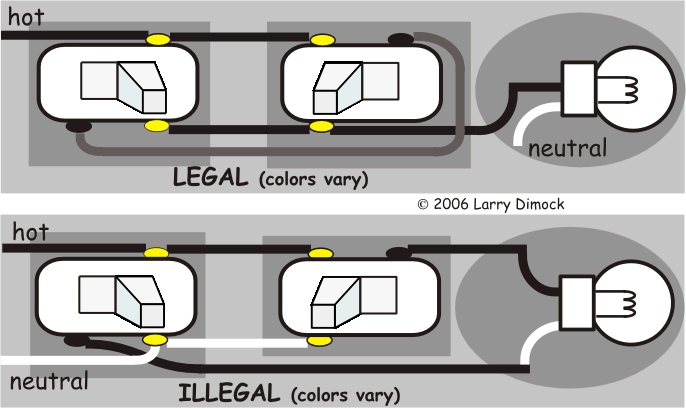
Wire connections
Open-neutral outlet
Open-ground outlet
Reverse polarity outlet #1
Reverse polarity outlet #2
From Malfunctions page:
System weak points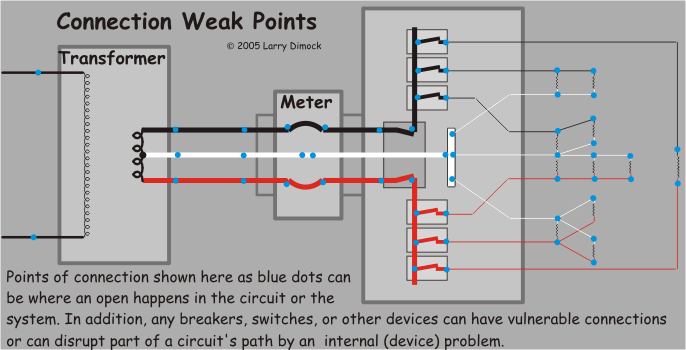
Wire connections
From Main Service Wire Open page:
Main wire open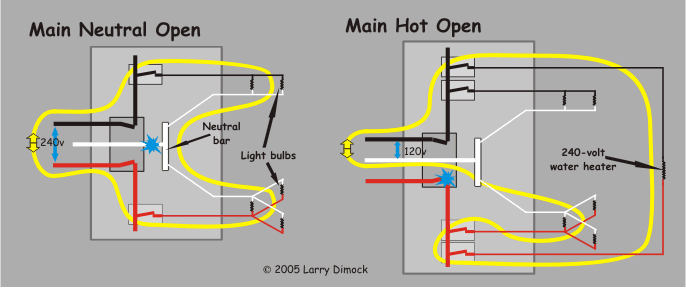
From Double Circuit page:
Shared neutral open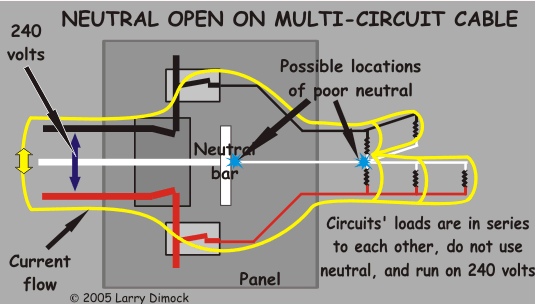
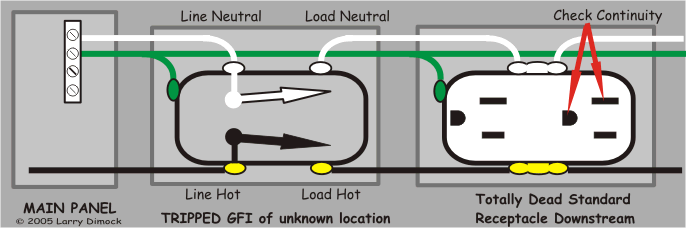
From Troubleshooting page:
Dead/live border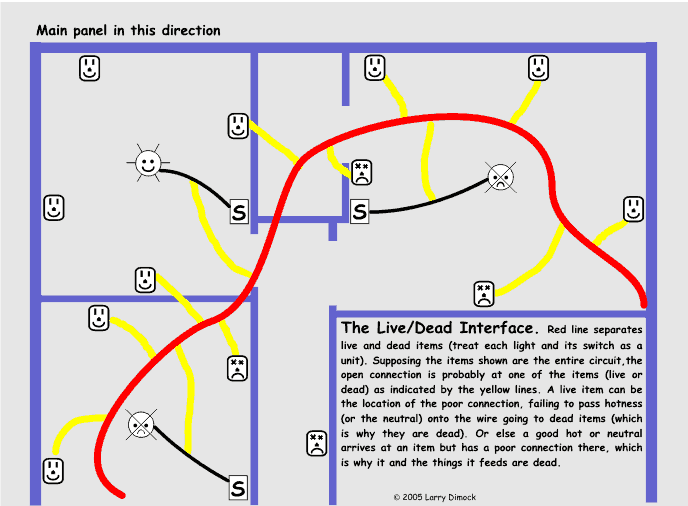
From Outlet Corrections page:
Open-hot outlet
Open-neutral outlet
Open-ground outlet
Reverse polarity outlet #1
Reverse polarity outlet #2
From Melted Wires page:
Melted wires photo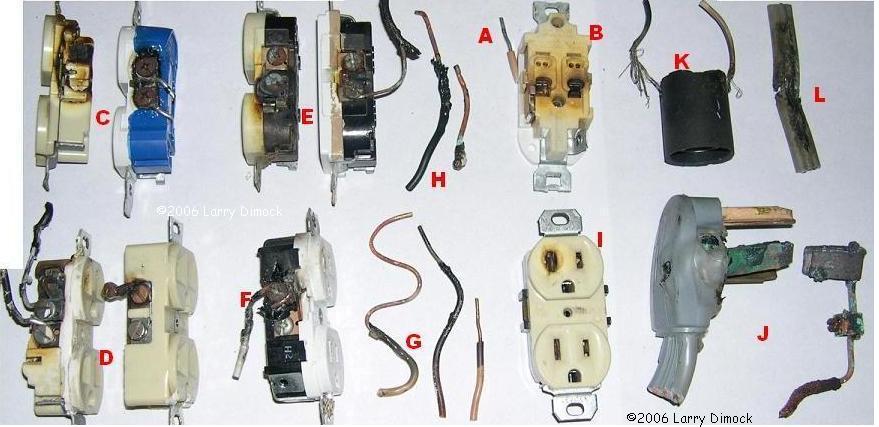
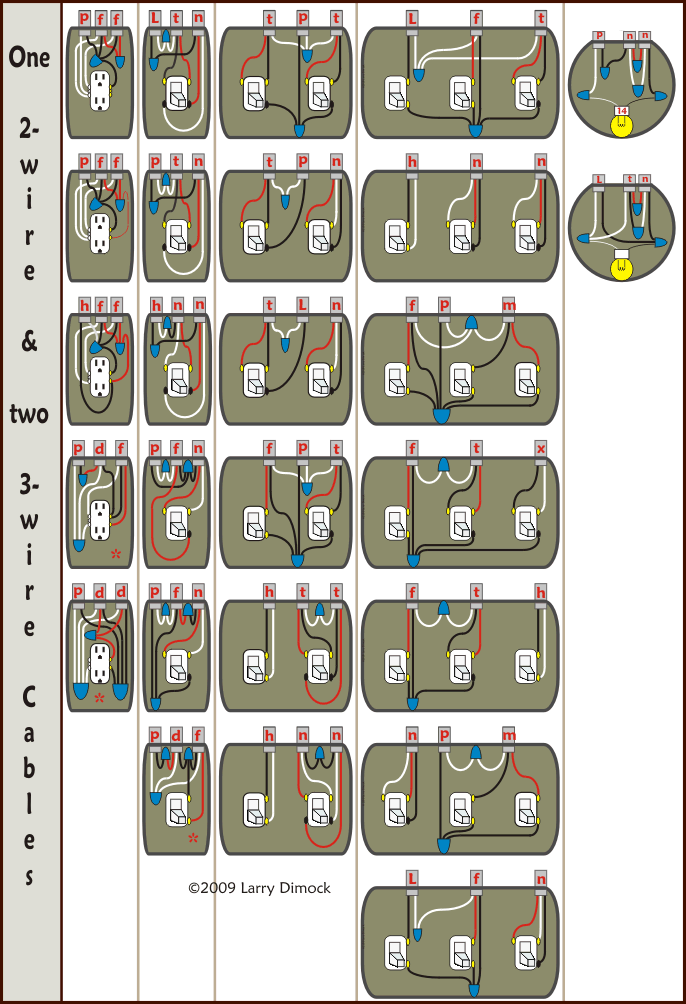
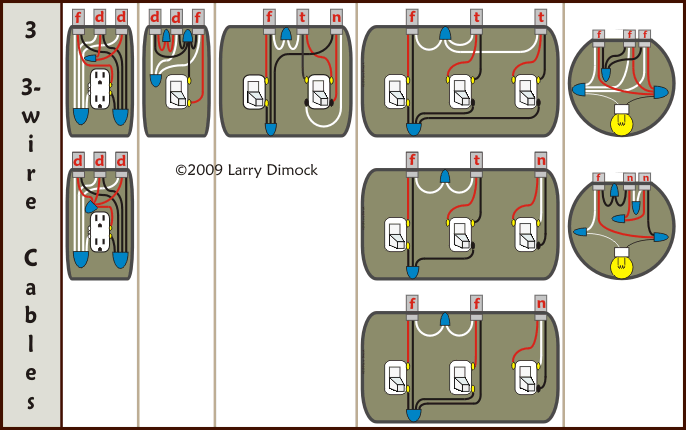
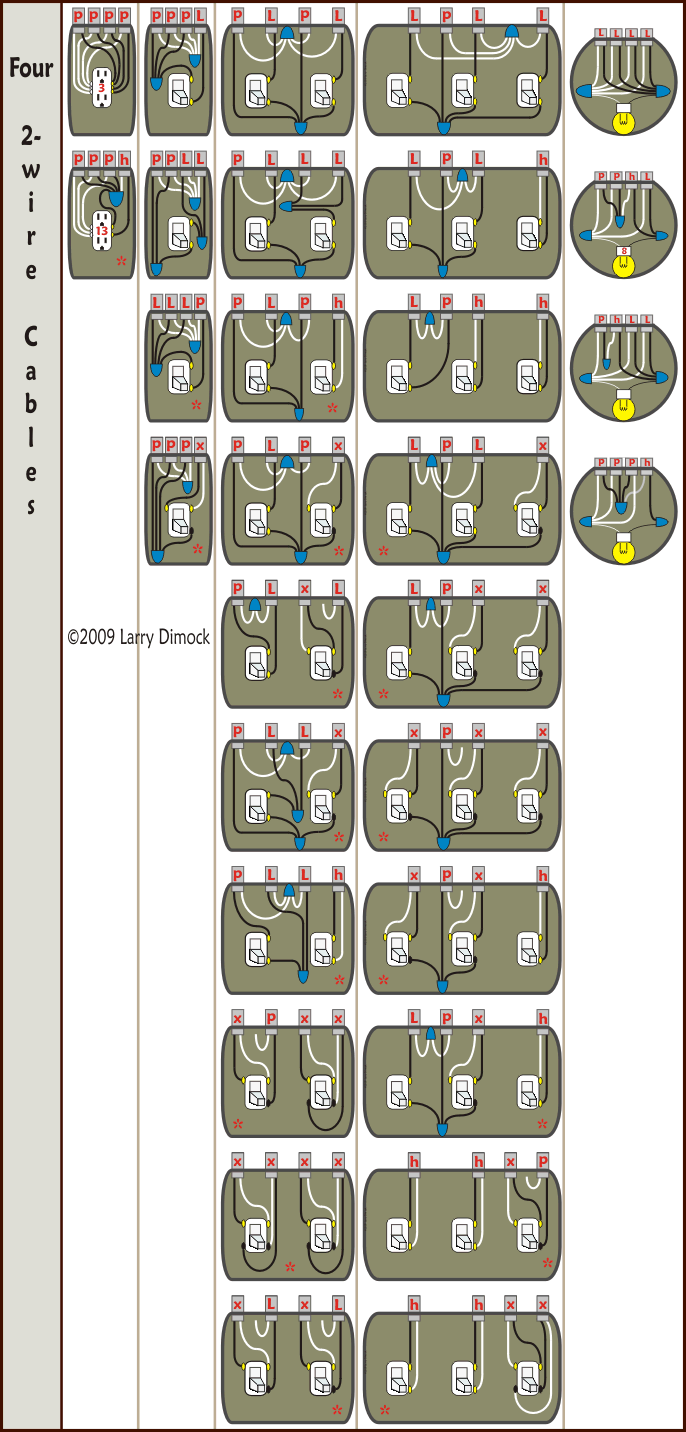
Diagrams of Connections
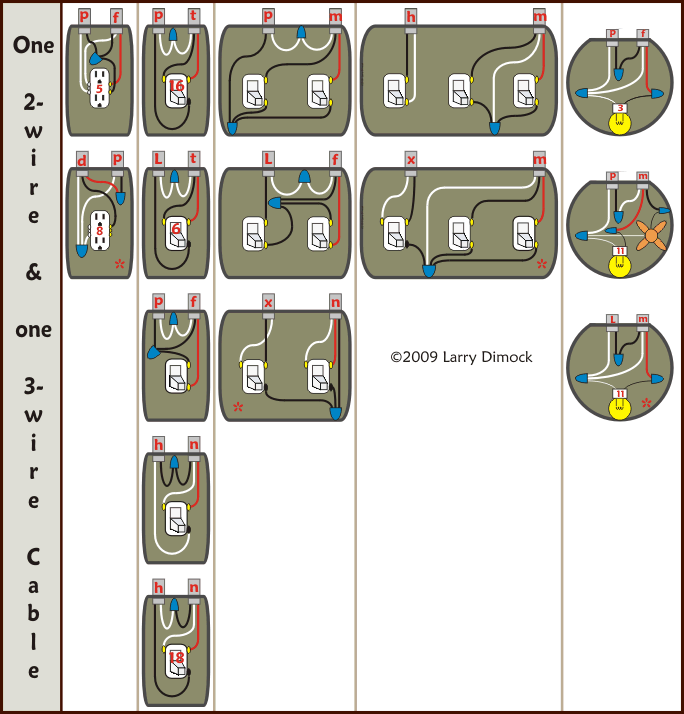
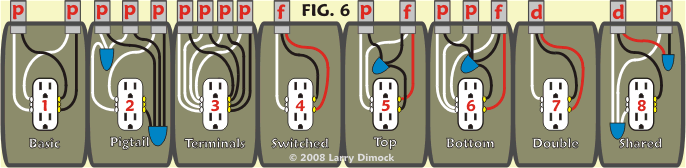
One round cable
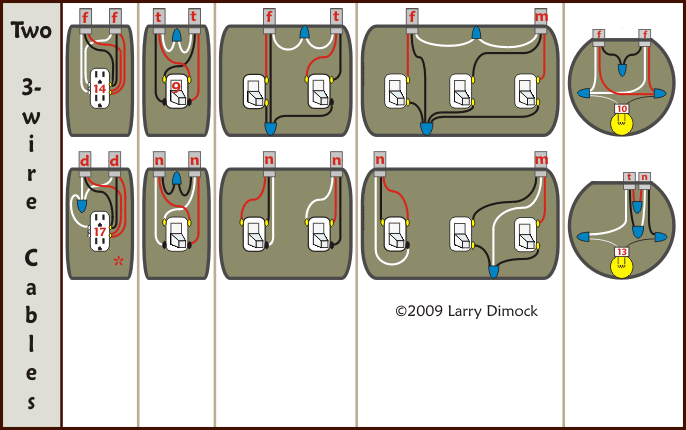
Two flat cables
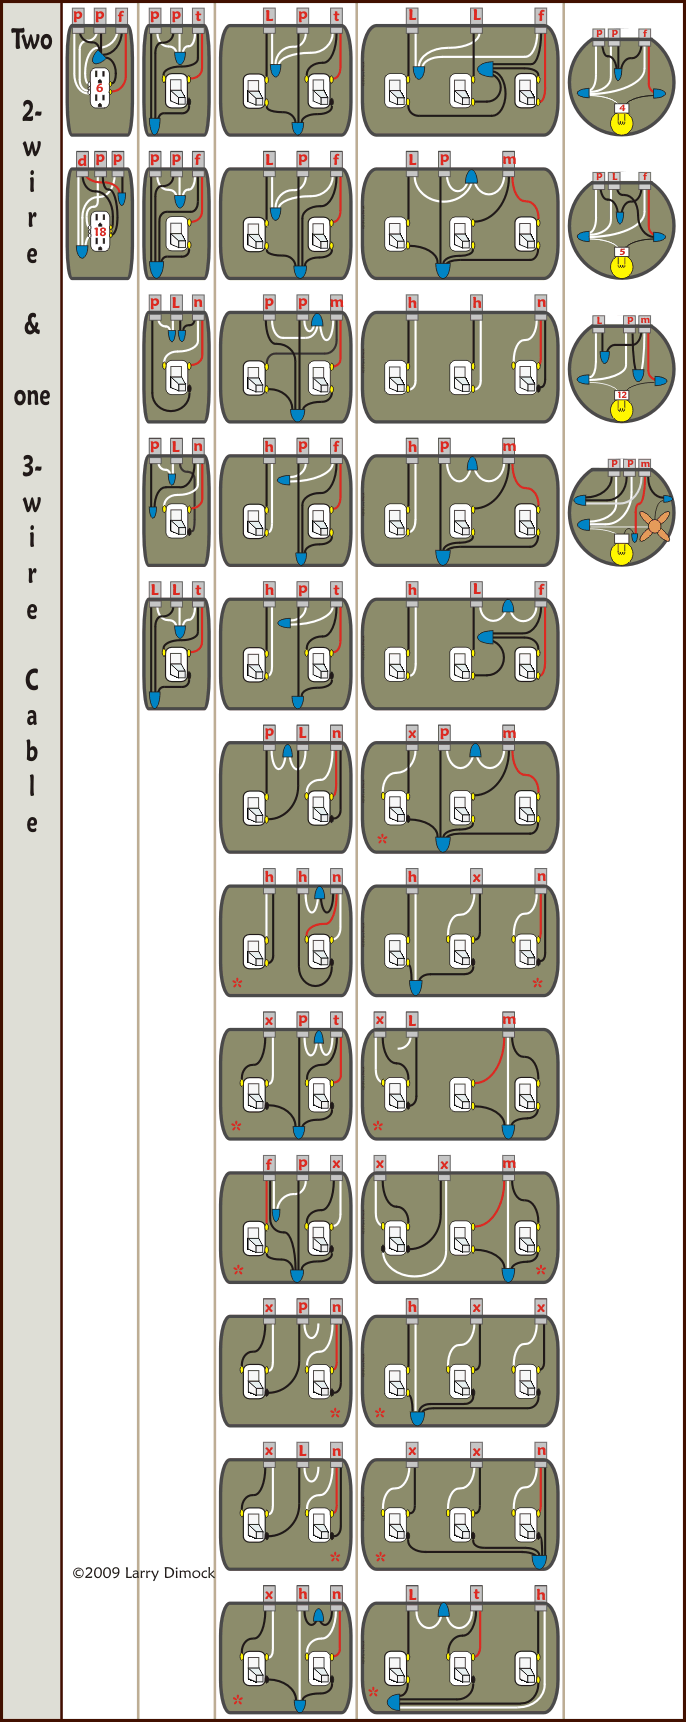
One flat, one round
Two round cables
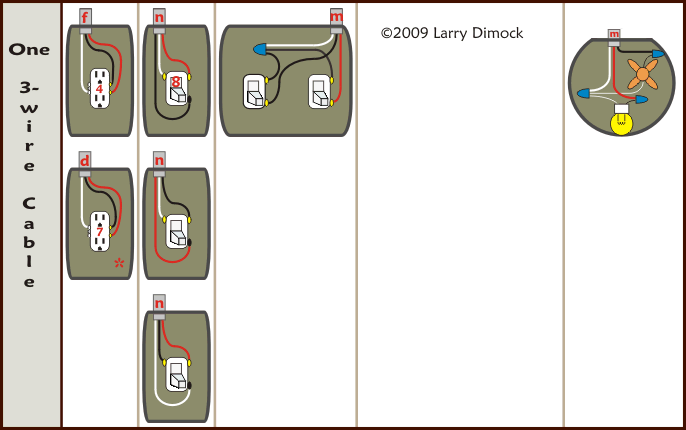
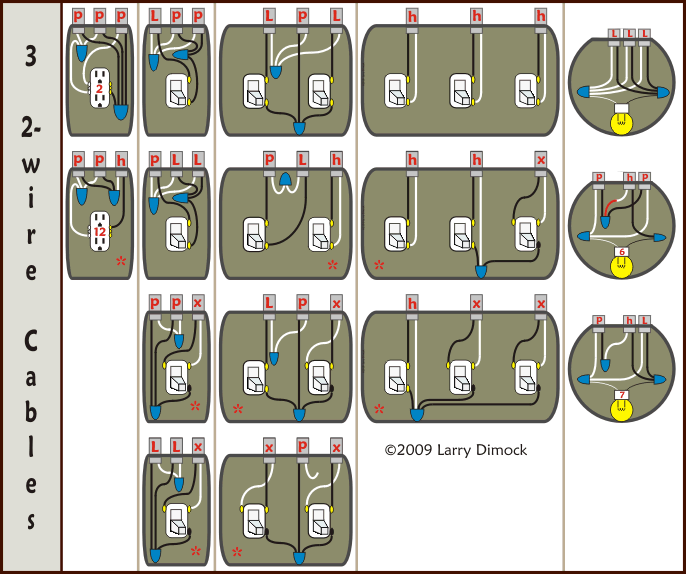
Three flat cables
Two flat, one round
One flat, two round
Three round cables
Four flat cables
Three flat, one round
From Cable Connections page:
One flat cable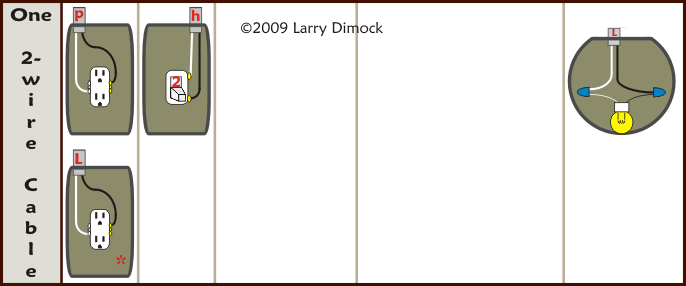
One round cable
Two flat cables
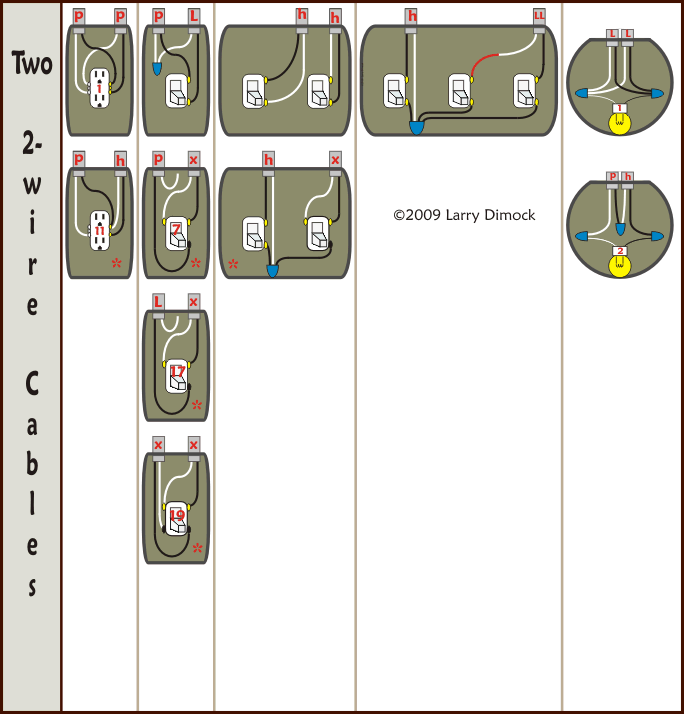
One flat, one round
Two round cables
Three flat cables
Two flat, one round
One flat, two round
Three round cables
Four flat cables
Three flat, one round
From Explanation page:
Pigtails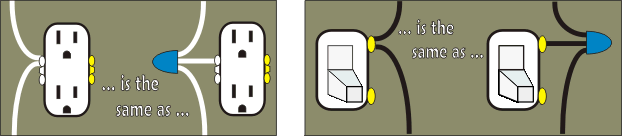
Diagrams of Switches
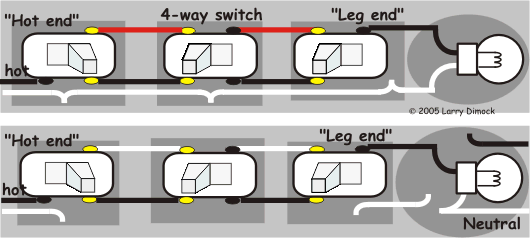
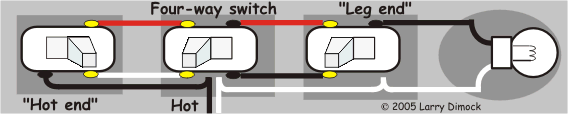
Basic 4-way switch
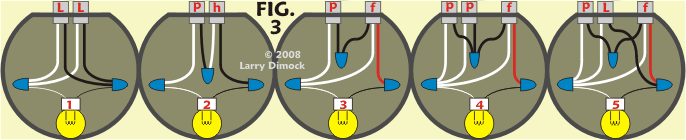
3-way switch #1
3-way switch #2
3-way switch #3
3-way switch #4
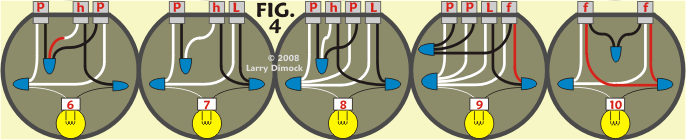
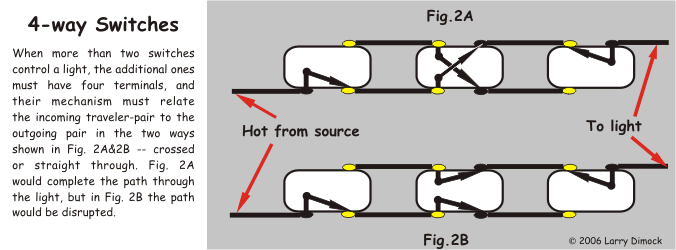
4-way switch #1
4-way switch #2
Rare 3-ways switches
9-gang box #2
From Background page:
Basic switch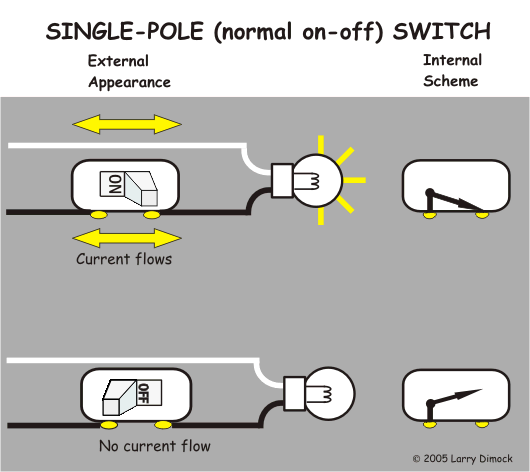
From Three-Way page:
Basic 3-way switch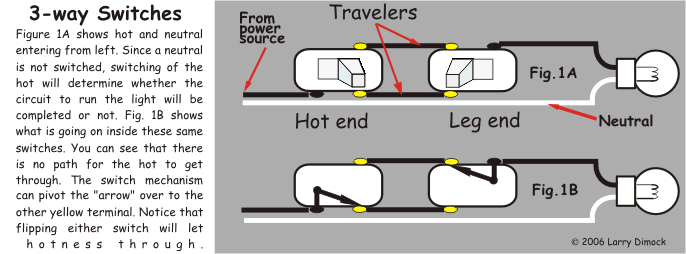
Basic 4-way switch
3-way switch #1
3-way switch #2
3-way switch #3
3-way switch #4
4-way switch #1
4-way switch #2
Rare 3-ways switches
From Tutorial page:
9-gang box #1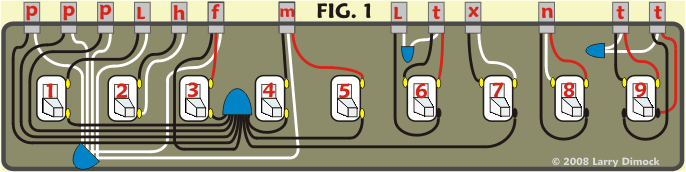
9-gang box #2
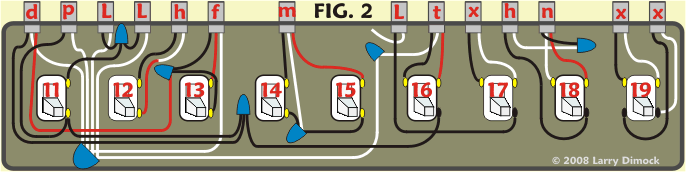